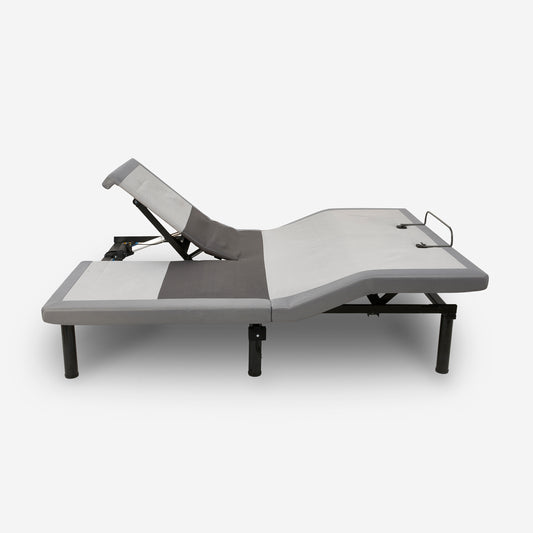
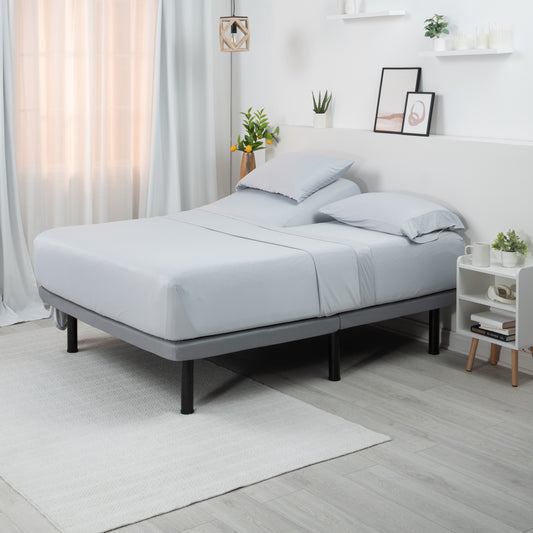
An adjustable base changes how you use your bed. The Flex SH is built for split-king setups, so each side adjusts on its own. Two people, two positions, no negotiating over the remote.
This guide pulls everything from the Flex SH owner's manual into one readable resource: assembly, remote pairing, preset positions, Foot Sync, app control, and troubleshooting. The full PDF is embedded below if you want the diagrams alongside the steps.
Download the full Flex SH manual (PDF) (opens in a new tab)
What Comes in the Box
Before you start, lay everything out and confirm all parts are accounted for. Small components can shift during shipping, so check carefully before disposing of any packing materials.
What's Included
| Item | Qty | Notes |
|---|---|---|
| Remote Controls | 2 | Pre-paired; one per side |
| AC Power Cords | 2 | One per foundation half |
| Power Supply with Battery Backup | 2 | Connects DC cord to AC source |
| Motion Sensors and Mounting Brackets | 2 | One per side; clips to center leg |
| Adjustable Legs | 6 | Three height options: 4", 7⅝", 11⅜" |
| Mattress Retainer Bar | 1 | Flat bar for our mattresses; alternate method for others |
| AAA Batteries | 6 | For the remote controls |
Headboard brackets and stabilizer brackets are optional and not included; both require a 1/2 inch (13mm) socket and wrench. If you plan to attach a headboard or anchor the base to a slat frame, pick those up before you start.
Before You Start
Dispose of all packing materials immediately. Plastic bags pose a smothering risk to children and pets. Make sure children and pets are clear of the area before operating any moving parts.
How to Set Up the Flex SH
The Flex SH sets up two ways: freestanding without a bed frame, or inside an existing frame on a slat base. The steps are similar; the main difference is whether you install the legs at all.
Setup Without a Bed Frame
Eight steps from box to first test. Work through them in order, because the leg sequence and the flat-base check both matter later.
Freestanding Setup, Step by Step
-
1Open and unpack Open the box lid and remove all accessories. Set everything aside before touching the foundation itself.
-
2Remove the safety clip Pull the red plastic safety clip from the folded foundation. Remove the locking pin by pulling upward and rotating it 90 degrees counterclockwise.
-
3Install the first four legs Using a flipping motion, stand the base upright on the headboard end. Install those four legs first and make sure each one is tight.
-
4Flip and install the remaining legs Flip the foot end out of the box and lay it flat. Install the final two legs at the foot end, then tighten all six completely.
-
5Install the motion sensors Connect each motion sensor to its mounting bracket. Clip the bracket onto the center adjustable legs, then rotate 90 degrees clockwise to lock. Connect the sensor connectors, one on each side of the bed.
-
6Attach the mattress retainer bar For our mattresses, insert the flat retainer bar into the securing strap at the bottom of the mattress, then snap it into the retainer mounts. For other mattresses, install the bar one side at a time.
-
7Connect power Uncoil the AC power cords. Connect the DC cords from the control boxes into the power supplies, then connect the power supplies to your AC outlets. A surge protector is strongly recommended.
-
8Insert batteries and test Insert AAA batteries into both remotes. Bring the base completely flat, then test all remote functions before placing your mattress.
Setup Inside a Bed Frame
Skip the legs entirely for this method. Place the base directly on the slat surface and flip it flat, then route the DC power cords through the bottom or side of the frame toward your power source.
Use the double-sided tape to secure the motion sensors to the sides of the frame rather than the center legs. From there, power connection and remote setup match the freestanding method exactly.
Remote Control: Every Button Explained
The Flex SH ships with two remotes, one per side of the bed, and each controls its paired foundation half independently. Here is what every function does.
Zero G
Raises your legs above the level of your heart in one touch. A popular resting position and a common starting point for finding your own.
Anti-Snore
Gently raises the head section to a slight incline. One button takes you there and back, with no manual adjustment needed.
TV Position
Raises the head to a comfortable viewing angle. Good for reading too, or anything that would otherwise have you propping up pillows.
Flat
Returns the base to fully flat in one touch. Always store the base flat when it is not in use.
Head, Foot, Lumbar
Use the select buttons to choose a zone, then the up and down controls to dial in your exact position on that side.
Head and Foot Massage
Three intensity levels per zone. Cycle through intensities with the head or foot massage button; press stop to turn both zones off.
Under-Bed LED
Toggles the under-bed lighting on and off. Mood light color settings live in the BEDGEAR app.
Programmable Positions
Save your preferred head and foot angle as a custom preset. Hold the LED button for 5 seconds until SAVE appears, then choose your slot.
Because each side is independent, both people can save different presets without affecting the other. That is the main reason to choose a split-head base in the first place.
Foot Sync: Moving Both Sides Together
Want both sides of the bed to adjust at once? Foot Sync links the two foundations at the foot. Both remotes need to be individually paired first.
With both foundations flat, press and hold the sync buttons on both remotes at the same time for 8 seconds, until the LCD shows SYNC. Worth knowing before you commit: once synced, the two remotes can no longer be used independently.
Remote Lock
Useful if you have kids or pets who like pressing buttons. Hold the head-up and foot-down buttons at the same time for 5 seconds to lock the remote; the LCD shows LOCK. Repeat the same hold to unlock. This is also the first thing to check if a remote suddenly stops responding.
Need to Re-Pair a Remote?
Unplug both power cords and remove any backup batteries. Plug the left-side cord back in, then hold the head-up and foot-up buttons until the LCD shows PAIR. The screen will show PASS when pairing is confirmed. Repeat for the right remote; the two cannot be paired at the same time.
Setting Up the BEDGEAR App
The app gives you full control from your phone. It connects over Bluetooth and pairs automatically once you open it, with no account and no extra steps.
How to Download and Connect
Search for "bedgear" in the App Store or Google Play and install the app. Before opening it, switch on Bluetooth and make sure the Flex SH is powered on. The app finds your base automatically within the 33-foot (10-meter) Bluetooth range.
From there you get everything the physical remote offers: head, foot, and lumbar adjustment, preset positions, massage intensity, under-bed lighting, and mood light colors. The settings screen also lets you rename your base, check the control box serial number, and open the owner's manual and troubleshooting guide.
Pacemaker Notice
The Flex SH contains Neodymium magnets that may interfere with pacemakers, ICDs, and other magnetically sensitive devices. If you use such a device, consult your physician before using this product. The massage vibration feature may also be falsely interpreted as movement by some pacemakers. Speak with your doctor before using the massage function.
Troubleshooting the Flex SH
Most issues come down to one of three things: power, pairing, or an accidentally locked remote. Work through the table below before reaching for the phone.
Common Issues and Fixes
| Problem | What to Check |
|---|---|
| Remote is locked and won't respond | Hold the head-up and foot-down buttons at the same time for 5 seconds. The LOCK indicator will disappear from the LCD. |
| Remote not controlling the base | Check the battery level in the upper-right of the LCD. If the batteries are fine, re-pair the remote using the steps above. |
| Audio system won't pair | Restart the power base. Stay within the 26-foot pairing range and avoid pairing through a wall. Only one device pairs at a time, so disconnect the current device first. |
| No sound from audio system | Check that volume is not at minimum on your paired device, and confirm the audio kit is properly paired. |
| Base won't power on | Confirm the DC power cord is fully connected to both the control box and the power supply. Check that the power supply is plugged into a working grounded outlet. A surge protector is strongly recommended. |
If your issue is not listed above, the BEDGEAR app includes a troubleshooting section in its settings screen. You can also reach our customer service team at 631-414-7763.
Getting the Most From Your BEDGEAR Flex SH Adjustable Base
Setup rewards patience. Install the legs in order, seat the motion sensors properly, and test both remotes with the base flat before the mattress goes on. Ten extra minutes there saves a much longer afternoon later.
After that, the split-head design does the work. Save a preset on each side, learn the remote lock before a toddler finds it, and decide whether you actually want Foot Sync before you enable it. If you want the neck zone this model leaves out, our Flex LSX setup guide covers that base in the same detail.
Frequently Asked Questions
The most common questions about the Flex SH, answered.